
1. Overview
The Involv Share Link component puts the address of the page on the page itself, with a button to copy it. Colleagues pass the page on without going to the browser bar, selecting the address and copying it by hand.
It earns its place on pages people share often: policies, procedures, support articles, a news post everyone has to read. On a page nobody forwards, it is one element too many.
The component works on Involv intranet sites and on standard SharePoint sites.
2. What you'll learn
- How to add the Involv Share Link component to a page
- What visitors see and what happens when they click
- Why the address looks different while you are editing
- Where to limit the component to a specific audience
3. Add the component to a page
Open the page in edit mode and click the + to add a component. Search for Involv Share Link and select it. That is all: the component has no settings of its own, it picks up the address of the page it is placed on.
Position matters more than configuration here. Put it where someone is when they decide to forward the page: under the title on a short page, at the end on a long procedure.

4. What visitors see and do
Visitors see a field with the address of the page and a Share Link button next to it. One click and the button briefly turns into Copied!: the address is on their clipboard, ready to paste into Teams, an email or a document.
One thing to know while you are building the page. In edit mode the field shows the address including ?Mode=Edit, because that is the page you have open at that moment. On the published page the address is clean. Check the result after publishing, not while editing, otherwise you are looking at an address no visitor will ever get.
5. Audience, styling and mobile visibility
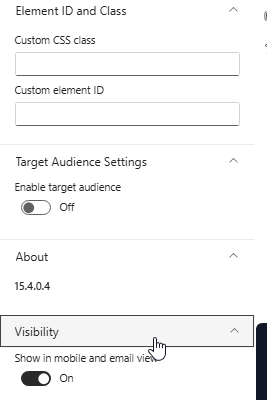
The properties panel contains no settings for the component itself, only the standard groups.
Under Target Audience Settings, switch on Enable target audience if the component should only be visible to part of the organisation, based on your Microsoft 365 groups.
Element ID and Class lets you add a Custom CSS class or a Custom element ID for custom styling, and Show in mobile and email view under Visibility controls whether the component also appears in the mobile app and in email views. Keep that one on: copying an address on a phone is more awkward than on a desktop, so this is exactly where the component helps most.
6. Result
Your page now carries its own address with a copy button. Publish the page and check the address in the field: that is the link your colleagues will be passing around.
For related topics, see How to add a component on a page? and How to configure Involv page properties?
Involv version 5.4