
1. Overview
A community in the Involv intranet Social Feed is a Microsoft 365 group site. The group decides who is a member, and the site stores the posts. Because SharePoint itself has no notion of a community, a site only becomes a community once it is set up for the Social Feed: that is what the Social Feed Manager does.
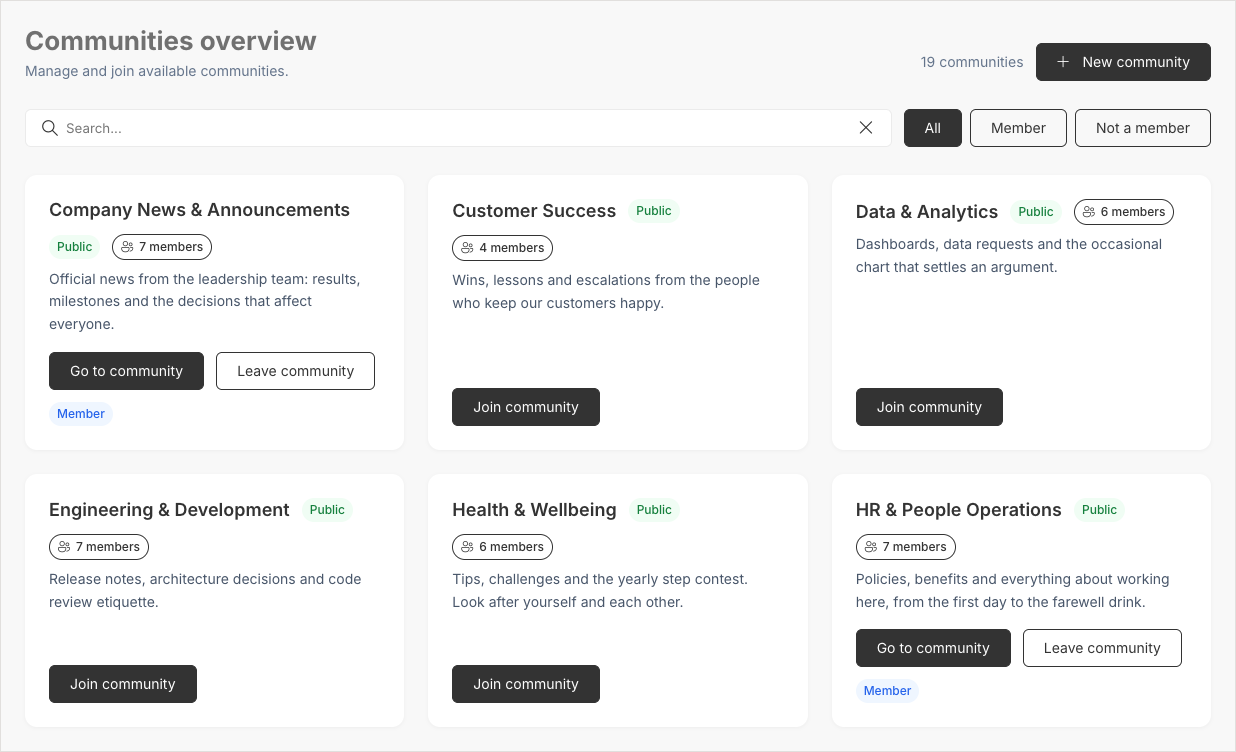
The Social Feed Manager web part has two roles. For everyone, it is the communities overview: an overview of the communities of the intranet, where people search communities, see who is in them, and join or leave them. For site collection administrators, it is also where new communities are created, where existing group sites are promoted to communities, and where communities are renamed.
Use this article when you set up the Social Feed for the first time, when a team asks for a new community, or when an existing Microsoft 365 group should get a community feed.
2. What you'll learn
- How to add and configure the Social Feed Manager web part
- How to create a new community from the communities overview
- How to promote an existing Microsoft 365 group site to a community
- Where to let posts open, and why that choice matters
- How people join, leave and request access to communities
- How to rename or remove a community
3. Add and configure the Social Feed Manager
Edit the page, add the Involv Social Feed Manager web part and open its property pane. Title is shown above the overview.
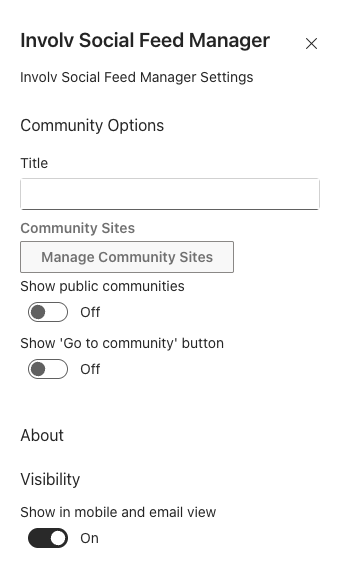
Under Community Sites you list the communities the overview shows. Per community, enter a Title, pick the Microsoft 365 group under Target group IDs and enter the full Url of the community site. By default, the overview follows the name of the Microsoft 365 group, so a rename is picked up automatically. Tick Override the community name to show your own Title instead, which is useful to give a community with a long name a shorter one in the overview. Redirect Link is optional and is where Go to community leads, for a community that people read somewhere else than on its own site.
Private communities always have to be added here. Search only returns sites a person can already see, so a private community someone is not a member of yet would never show up otherwise, and that is exactly what the overview is for.
Turn on Show public communities to list every public community of your tenant automatically, next to the configured ones. Then you only need to configure the private communities. When a community is both configured and found automatically, the configured version wins and keeps its title and redirect link. Show 'Go to community' button adds a button to the community site on the card of every community the user is a member of.
4. Create a new community
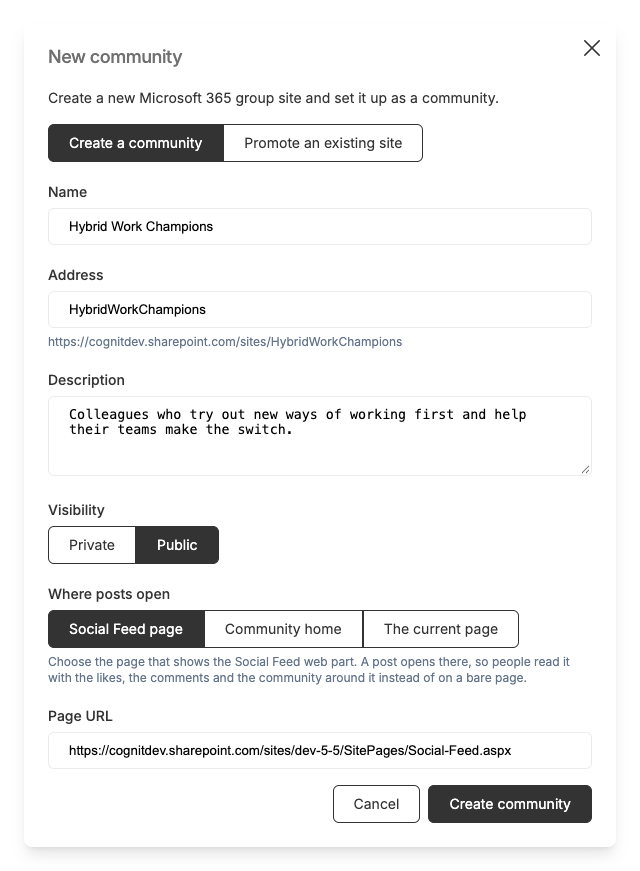
Only site collection administrators of the site the Social Feed Manager is on see the New community button. Tenant administrators and Involv intranet administrators who are not site collection administrators of that site do not see it. Click it and stay on the Create a community tab.
Enter a Name, an Address for the site and an optional Description, and choose whether the community is Private or Public. A public community lets anyone join straight away. A private community turns a join into a request that the owners approve. The name and the address are checked while you type, the same check SharePoint makes when you create a site, and Create community only becomes available once both are free.
The group and its site are created as you, so the Microsoft 365 group creation policy of your tenant applies. When the site is ready, it opens in a new browser tab: that visit is what makes SharePoint finish setting up the libraries the feed needs. Keep the dialog open until it reports that the community is fully set up.
If your tenant restricts who can create Microsoft 365 groups, creating the community fails with Could not create the community, followed by the error SharePoint returned. In that case, ask someone who is allowed to create groups to create the group site, and turn it into a community with Promote an existing site.
5. Promote an existing site to a community
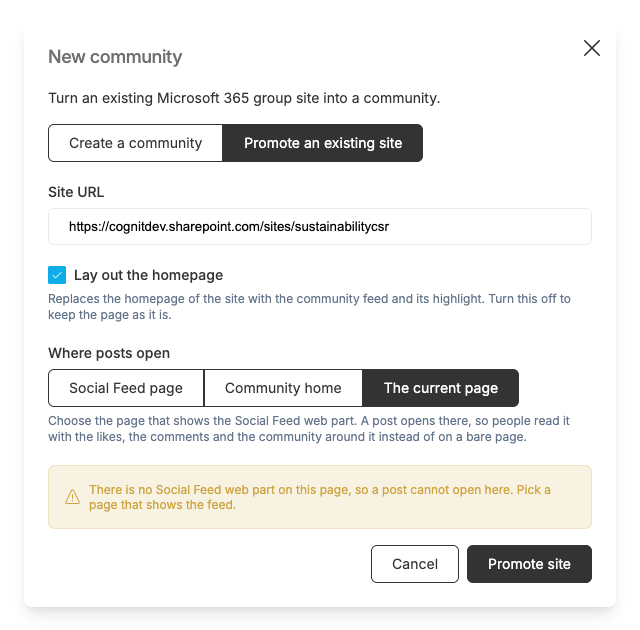
If a Microsoft 365 group site already exists, for example the site of an existing team, you can turn it into a community instead of creating a new one. Click New community and open the Promote an existing site tab. Enter the address of the site; the dialog checks that it is connected to a Microsoft 365 group. A site without a group cannot become a community. To promote a site, you need to be a site collection administrator of the site the Social Feed Manager is on, and an owner of the community site.
Lay out the homepage is on by default. It replaces the homepage of the site with the feed of this community on the left and its community highlight on the right. If the site already has a homepage you built yourself, turn this option off.
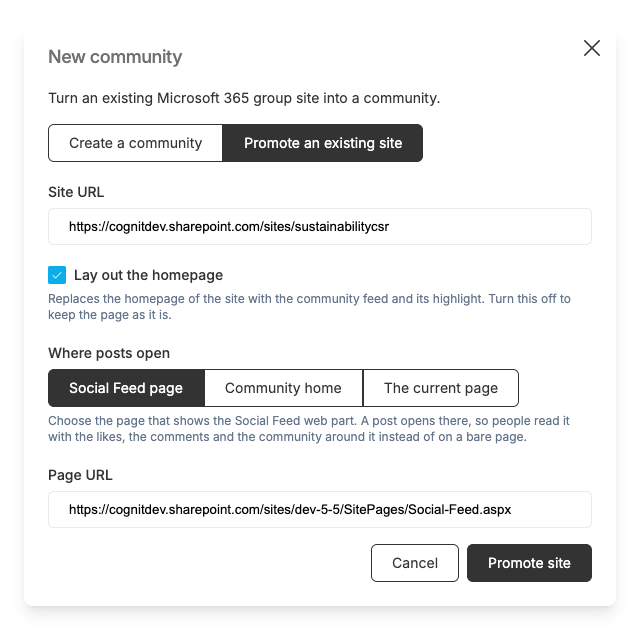
While promoting, the Social Feed Manager sets up the site in one go: it gives members the permission level they need to post (Involv Community Contributor), adds the Social Feed content types, installs the Involv intranet apps the site needs, copies the global settings of your intranet so the site looks and behaves like the rest of it, lays out the homepage when you asked for it, and finally marks the site as a community. The dialog names each step while it runs.
Promoting a site that is already a community is safe. It is also how a community that was set up with an older version is brought up to date; see How do you upgrade and troubleshoot Social Feed communities in Involv intranet?.
6. Choose where posts open
Both tabs end with the same question: Where posts open. A post is best read in the feed, with its likes, comments and community around it. When someone opens a post from a link or from an email, they are sent to the page you choose here.
Social Feed page is the default and the usual choice: enter the address of the page where your intranet shows the Social Feed. It is also the only option that has to be filled in. Community home stores nothing and opens posts on the homepage of the community itself, which suits a community that is read on its own site. The current page uses the page the Social Feed Manager is on; this only works when that page also shows a feed, and the dialog warns you when it does not.
This matters because SharePoint sends its own emails when someone comments on a post, and those emails cannot be turned off per post or per community. Thanks to this setting, a link in such an email opens the post in the feed instead of on a bare storage page.
7. Join, leave and request access
Every community in the overview is a card with its name, a Public or Private badge, the number of members and a description. Use the search box to find a community by name, and the All, Member and Not a member buttons to filter.
Join community lets anyone into a public community straight away. For a private community it sends a request to the owners, who approve or reject it from the email they receive. Until the request is approved, the card shows Request pending, for at most 14 days. Microsoft 365 does not report whether a request is still open or was turned down, so the status is remembered in the browser of the person who asked: it does not show on another device or in another browser. After 14 days the card offers Join community again, so a request that was turned down or forgotten does not leave anyone waiting for good.
Only accounts with an Exchange mailbox can become a member of the Microsoft 365 group behind a community. Someone without a mailbox who tries to join sees You can't join this community because your account has no mailbox. Please contact your IT department. A join that fails for another reason shows Failed to join. Please try again or contact support., followed by the reason when there is one.
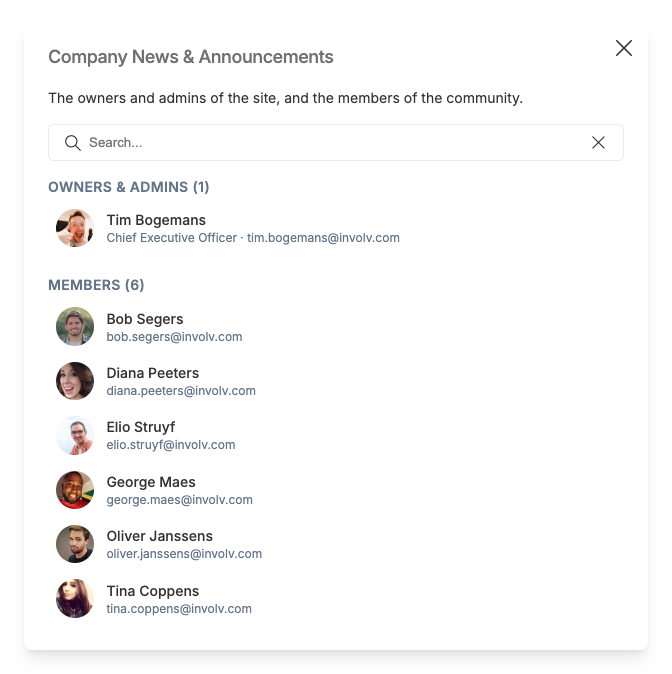
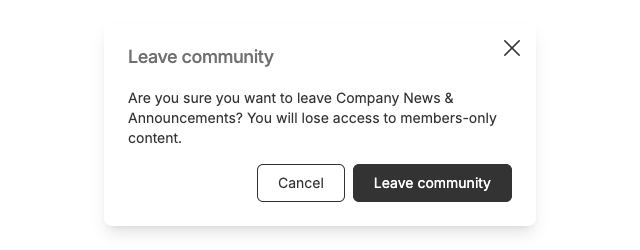
Leave community asks for confirmation before the member is removed. Clicking the member count shows the owners and members of the community.
8. Rename or remove a community
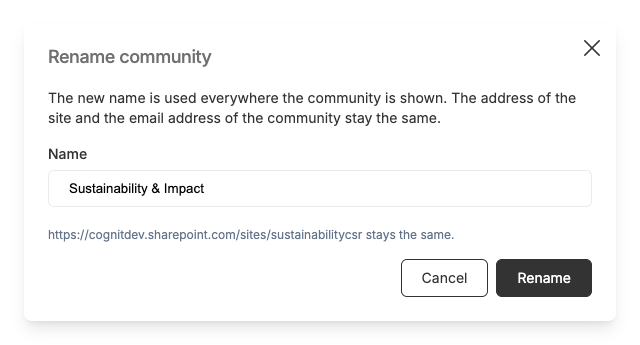
The name of a community is the name of its Microsoft 365 group, so a rename changes it everywhere the community is shown. The address of the site and the email address of the group stay the same.
Only owners of the group can rename it, which for a group site means its site collection administrators. They see a Rename button on the card. If the overview shows the community under a title of its own (Override the community name), the dialog points out that the rename changes the real name of the community, not that configured title.
To remove a community, delete its Microsoft 365 group. This also removes the community site and every post stored on it.
9. Result
To show people the communities they belong to, or to highlight one community on a page, see How do you configure the My Groups web part in Involv intranet? and How do you configure the Community Highlight web part in Involv intranet?.
Your intranet now has an overview where people find, join and leave communities, and you can create and promote communities without going through SharePoint site creation by hand. A new or promoted community still has to be added to the Community Sites of the Social Feed Manager and of feeds that use a configured list, unless it is public and Show public communities is on, or the feed uses Found through search.
For related topics, see How do you configure the Social Feed web part in Involv intranet? and How to configure SharePoint permissions on Involv intranet sites.
Involv version 5.5