
1. Overview
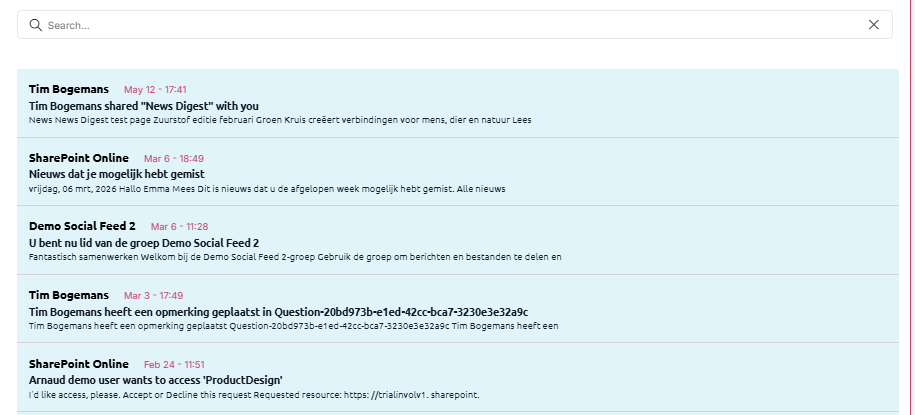
The Involv Emails component shows users their own mailbox on an intranet page. Every message is listed with its sender, subject, a line of preview text and the date, and a search bar lets people find an older message without leaving the intranet.
The component has no source settings: it reads the mailbox of the person visiting the page, so one page configuration serves everyone and nobody sees anyone else's mail. That makes it a natural fit for a personal page, next to components such as My Tasks, My Apps and the Involv Graph Calendar.
Think about where you place it. A mailbox is personal, and on a page that colleagues look at together it is the last thing people want on screen.
2. What you'll learn
- How to add the Involv Emails component to a page
- How to choose between the Simple and the Modern template
- How to decide how many messages are shown
- How to filter on sent, drafts, read, deleted and a specific sender
- Where to limit the component to a specific audience
3. Add the Involv Emails component to a page
Open the page in edit mode and click the + to add a component. Search for Involv Emails and select it. Click the pencil icon on the component toolbar to open the settings panel on the right.
The panel is grouped into General, Filters, Technical settings, Element ID and Class, Target Audience Settings, About and Visibility.
4. Choose the template and how many messages are shown
Title is the heading above the list. Leave it empty when the page already has a heading of its own.
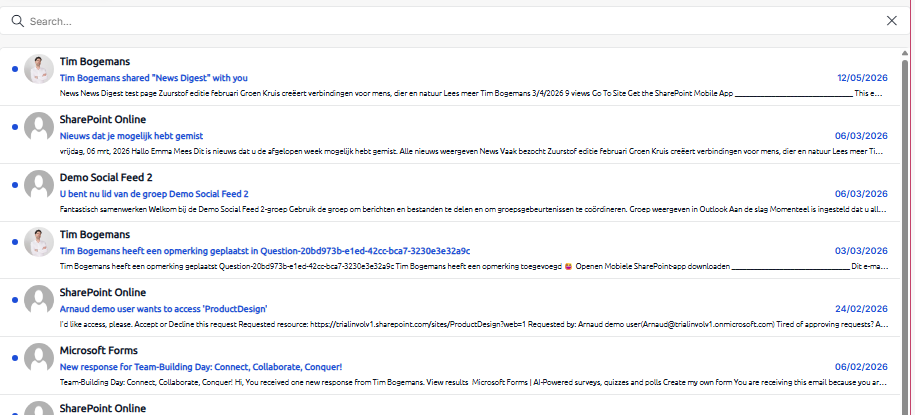
Template sets the layout and has two options. Simple lists the messages as plain rows: sender, subject, preview. Modern adds the sender's profile picture, marks unread messages with a dot and puts the date on the right. Simple is the quieter of the two and fits a narrow column; Modern is easier to scan when the component gets a full-width section.

Show the search bar puts a search field above the list. Keep it on if the component shows more than a handful of messages, because scrolling a mailbox on an intranet page is nobody's idea of a good time.
Max amount sets how many messages are shown. Keep it modest: this component is a glance at the inbox, not a replacement for Outlook.
Open links in a new tab determines what happens when a user clicks a message. Switching it on keeps the intranet page open behind it, which is usually what you want.
5. Filter which messages appear
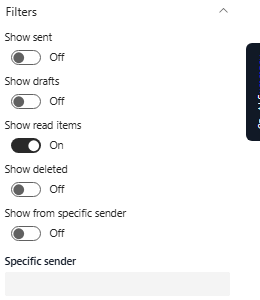
The Filters group decides which part of the mailbox ends up on the page. Each filter is a toggle:
- Show sent — include messages the user has sent
- Show drafts — include unfinished messages
- Show read items — include messages that have already been read. Switch this off and the component becomes a list of what still needs attention
- Show deleted — include deleted messages
- Show from specific sender — limit the list to one sender, which you enter in the Specific sender field underneath
That last combination is the most interesting one. Point the component at a single sender and the component stops being a mailbox: it becomes a feed of, for example, HR announcements or system notifications, on the page where people expect them.
6. Limit the component to a specific audience
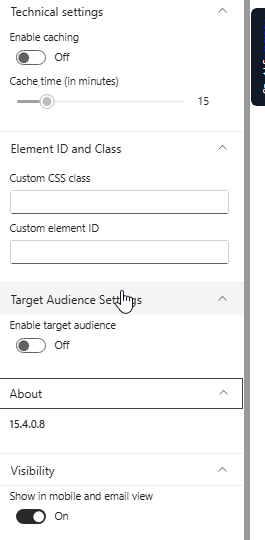
Under Target Audience Settings, switch on Enable target audience if the component should only be visible to part of the organisation. This uses the same audience targeting as the rest of Involv intranet, based on your Microsoft 365 groups.
For a personal overview this is usually left off: the component already personalises itself per user.
7. Apply caching, styling and mobile visibility
Technical settings contains Enable caching and Cache time (in minutes). Be careful here. Mail arrives all day, and a cached component keeps showing an inbox as it looked minutes ago, which quietly undermines the reason people look at it. Leave caching off unless the component sits on a very busy page and a short delay is acceptable.
Element ID and Class lets you add a Custom CSS class or a Custom element ID. Use these only when your organisation applies custom styling.
Under Visibility, Show in mobile and email view controls whether the component also appears in the mobile app and in email views.
The About group shows the version of the component, which is useful when reporting an issue to support.
8. Result
Every user now sees their own messages on the page, in the layout you chose and limited to the filters you set. One page configuration serves the whole organisation, and no permissions have to be arranged for it.
For related topics, see How do you configure the Involv Graph Calendar component in Involv intranet? and How do you configure the Involv Me component in Involv intranet?
Involv version 5.4